Emberwood Wrapped Cowl Free Pattern
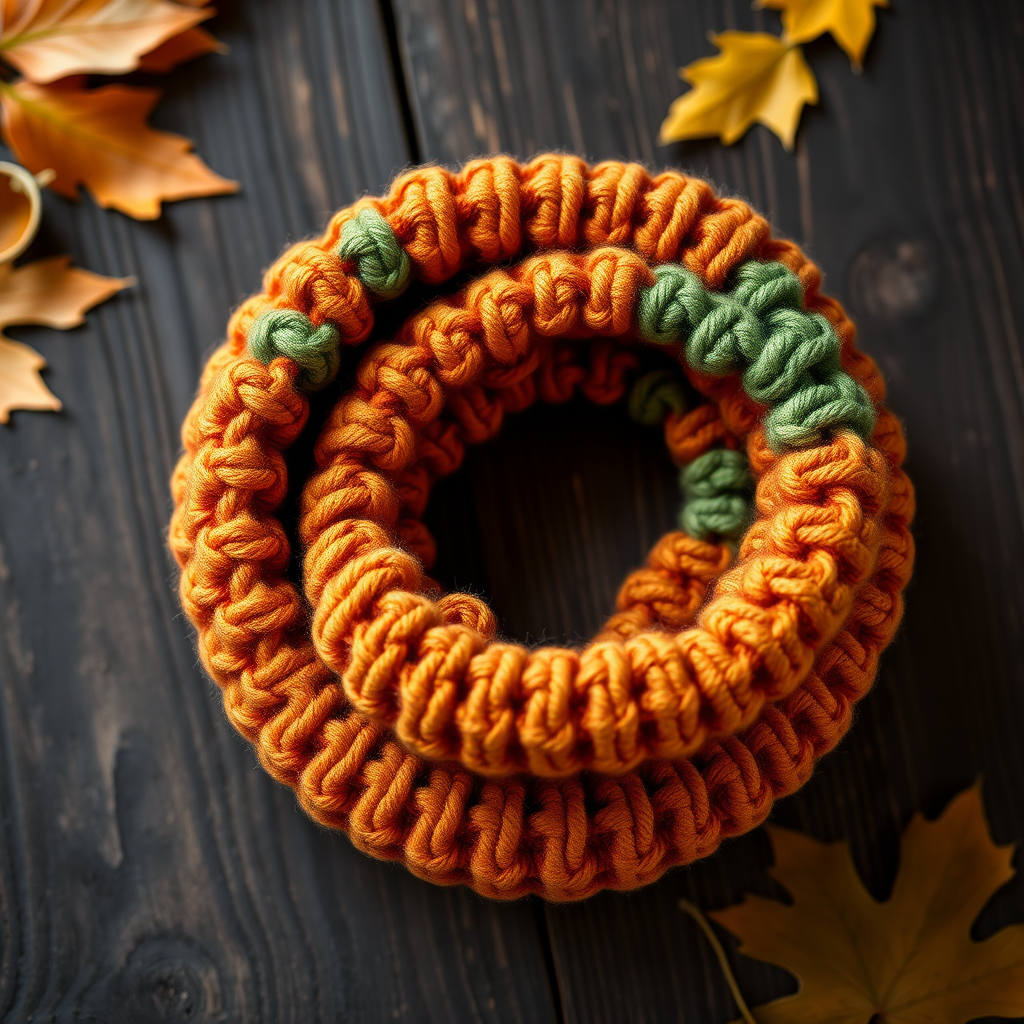
Wrap Yourself in Autumn: The Emberwood Wrapped Cowl Free Crochet Pattern
There is something magical about wrapping yourself in a handmade accessory that captures the essence of a season. The Emberwood Wrapped Cowl does exactly that—it brings the warm, woodland charm of autumn directly to your wardrobe. With its rich gradient of deep rust, golden amber, and forest green, this chunky crochet cowl is not just a practical accessory for crisp days; it is a statement piece that adds a touch of handcrafted coziness to any outfit.
This pattern is designed with beginners in mind, yet it produces a sophisticated, plush texture that looks far more complex than it actually is. By working in the round and alternating front post and back post double crochet stitches, you will create a beautiful, ribbed woven fabric that is dense, warm, and incredibly satisfying to make. Best of all, this is a free pattern that works up quickly with super bulky yarn, making it the perfect weekend project.
Whether you are new to crochet or a seasoned maker looking for a quick, gratifying project, the Emberwood Wrapped Cowl is sure to become a favorite. Let’s dive into everything you need to create this cozy masterpiece.
Materials Needed
Before you begin, gather your materials. Because this project uses super bulky yarn and a large hook, it works up fast—perfect for instant gratification. Here is exactly what you will need:
Yarn
- Super Bulky (Weight 6) Yarn in three colors:
- Color A: Deep Rust (approximately 120 yards)
- Color B: Golden Amber (approximately 120 yards)
- Color C: Forest Green (approximately 120 yards)
Pro Tip: Any super bulky yarn will work, but a wool blend or a soft acrylic will give you the best stitch definition for the post stitches. Look for a yarn that holds its shape well.
Hook and Notions
- Size N/P (10 mm) Crochet Hook
- Yarn needle for weaving in ends
- Scissors
- Stitch marker (optional, but helpful for keeping track of rounds)
Gauge
- 8 double crochet stitches and 5 rows = 4 inches in pattern
Important: While gauge is not critical for a cowl, matching it ensures your finished piece has the intended drape and size. If your gauge is off, simply adjust your hook size up or down to achieve the correct tension.
Step-by-Step Instructions
This cowl is worked in the round from the bottom up, creating a seamless, cozy tube. The stitch pattern uses front post and back post double crochet to create a ribbed, woven texture. Do not be intimidated by the post stitches—they are simple once you get the hang of them, and they create a stunning effect.
Special Stitches
Before you start, familiarize yourself with these two essential stitches:
- FPDC (Front Post Double Crochet): Yarn over, insert hook from front to back to front around the post of the next stitch, yarn over, pull through, complete as a double crochet.
- BPDC (Back Post Double Crochet): Yarn over, insert hook from back to front to back around the post of the next stitch, yarn over, pull through, complete as a double crochet.
Visualizing the Post: The "post" of a stitch is the vertical part of the stitch, not the top "V" where you normally insert your hook. When you work a FPDC, you are essentially wrapping the stitch from the front. For BPDC, you wrap it from the back. This creates the raised ridges that give the cowl its beautiful texture.
Getting Started: The Foundation Ring
Round 1: With color A (deep rust), chain 60. Join with a slip stitch to form a ring, being careful not to twist your chain. Chain 2 (this counts as your first double crochet). Work 1 double crochet in each chain around. Join with a slip stitch to the top of the beginning chain. (60 double crochet stitches)
Beginner Tip: To avoid twisting, lay your chain flat on a table and make sure all the "V" shapes are facing the same direction before you join. Place a stitch marker in the first stitch to help you keep track of your rounds.
Establishing the Ribbed Pattern
Round 2: Chain 2 (counts as first dc). *FPDC around the next stitch, BPDC around the next stitch; repeat from * around, ending with FPDC around the last stitch. Join with a slip stitch to the top of the beginning chain. (60 stitches)
Round 3: Chain 2 (counts as first dc). *BPDC around the next stitch, FPDC around the next stitch; repeat from * around, ending with BPDC around the last stitch. Join with a slip stitch to the top of the beginning chain. (60 stitches)
Note: By alternating the post stitches in this way, you create a beautiful checkerboard-like ribbed texture. The fabric will have a lovely stretch and recovery, perfect for a cowl.
Completing the First Color Block
Rounds 4-5: Repeat Round 2. At the end of Round 5, fasten off color A.
Fastening Off: To fasten off, cut your yarn leaving a 6-inch tail. Pull the tail through the loop on your hook and pull tight. This secures your work.
Adding the Second Color: Golden Amber
Round 6: Join color B with a slip stitch to the first stitch of the round. Chain 2 (counts as first dc). *FPDC around the next stitch, BPDC around the next stitch; repeat from * around. Join with a slip stitch. (60 stitches)
Rounds 7-8: Repeat Round 2. At the end of Round 8, fasten off color B.
Joining a New Color: To join a new color, insert your hook into the first stitch of the round, yarn over with the new color, and pull through both the stitch and the loop on your hook. This creates a secure slip stitch join.
Adding the Third Color: Forest Green
Round 9: Join color C with a slip stitch to the first stitch. Chain 2 (counts as first dc). *FPDC around the next stitch, BPDC around the next stitch; repeat from * around. Join with a slip stitch. (60 stitches)
Rounds 10-11: Repeat Round 2. At the end of Round 11, fasten off color C.
Repeating the Color Sequence
Now you will repeat the color blocks to create the full gradient effect. Follow the sequence carefully:
Round 12: Join color A with a slip stitch to the first stitch. Chain 2 (counts as first dc). *FPDC around the next stitch, BPDC around the next stitch; repeat from * around. Join with a slip stitch. (60 stitches)
Rounds 13-14: Repeat Round 2. At the end of Round 14, fasten off color A.
Round 15: Join color B with a slip stitch to the first stitch. Chain 2 (counts as first dc). *FPDC around the next stitch, BPDC around the next stitch; repeat from * around. Join with a slip stitch. (60 stitches)
Rounds 16-17: Repeat Round 2. At the end of Round 17, fasten off color B.
Round 18: Join color C with a slip stitch to the first stitch. Chain 2 (counts as first dc). *FPDC around the next stitch, BPDC around the next stitch; repeat from * around. Join with a slip stitch. (60 stitches)
Rounds 19-20: Repeat Round 2. At the end of Round 20, fasten off color C.
Finishing Touches
Weave in All Ends: Using your yarn needle, carefully weave in all loose ends on the inside of the cowl. Make sure to weave them in securely so they do not come undone with wear.
Blocking (Optional): If desired, lightly block your cowl to even out the stitches. To block, gently wet the cowl, squeeze out excess water (do not wring), and lay it flat to dry, shaping it to the correct dimensions.
Final Measurements: Your finished cowl should measure approximately 9 inches tall and 24 inches in circumference when laid flat. This size is perfect for wrapping around your neck once or twice for a cozy, stylish look.
Wear and Care Tips
Your Emberwood Wrapped Cowl is now ready to wear! Because it is made with super bulky yarn, it is incredibly warm and will quickly become your go-to accessory for chilly mornings. The ribbed texture gives it a beautiful drape, and the color transitions add visual interest without any complicated colorwork.
To care for your cowl, always check the yarn label for washing instructions. Most super bulky yarns are machine washable on a gentle cycle, but hand washing in cold water and laying flat to dry is always the safest option to maintain the shape and texture.
This pattern is wonderfully versatile. You can easily customize it by changing the color palette to match your personal style or the season. Imagine a version in soft pastels for spring or cool blues and greys for winter. The possibilities are endless!
We hope you enjoyed making your Emberwood Wrapped Cowl. It is a project that delivers both in process and in result—a beautiful, functional piece that you will be proud to say you made yourself. Happy crocheting!


