Chunky Alpine Ridge Cowl Free Pattern
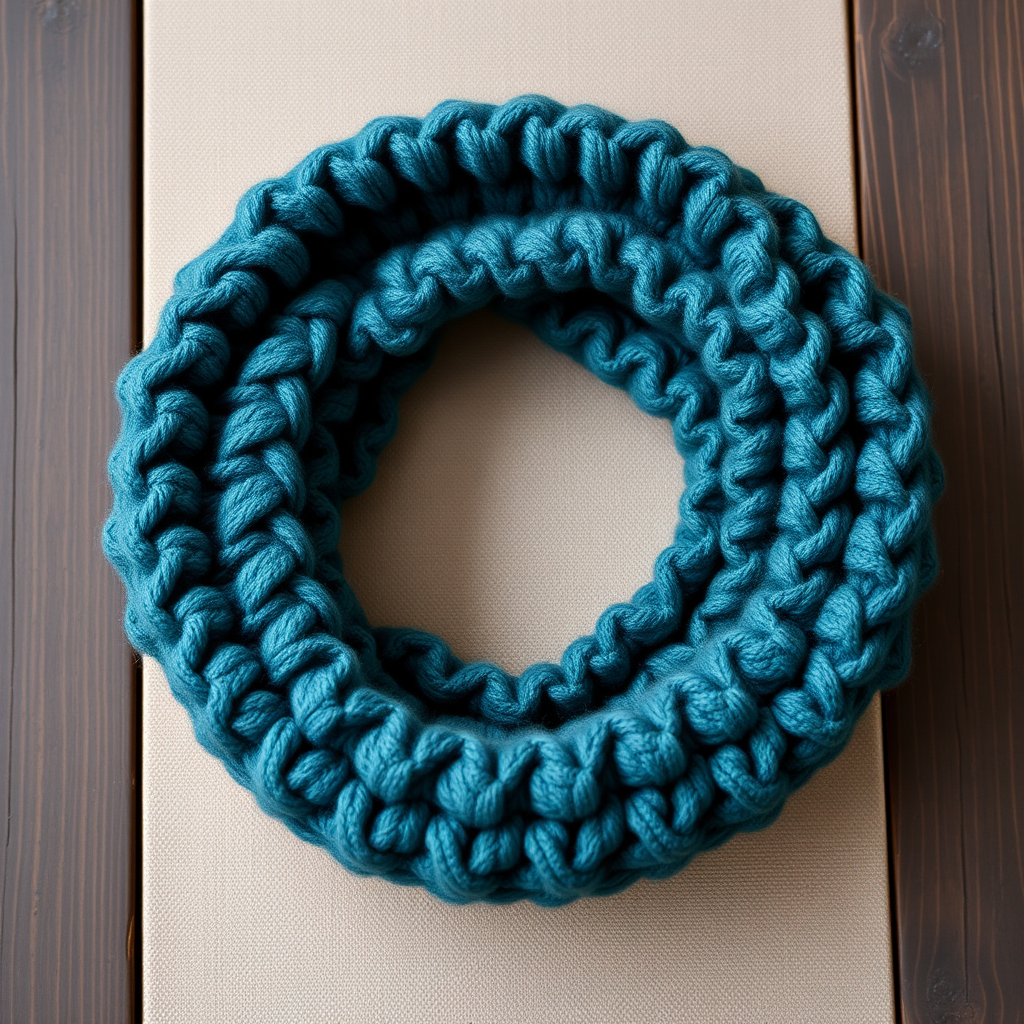
Wrap Yourself in Cozy Texture: The Chunky Alpine Ridge Cowl
There are some projects that feel like a warm hug from the very first stitch, and the Chunky Alpine Ridge Cowl is exactly that. This isn't just another winter accessory; it's a statement piece designed to elevate your cold-weather wardrobe with a modern, textured twist. The super bulky yarn works up quickly, making this an incredibly satisfying weekend project. The unique alpine ridge stitch creates a beautiful, dimensional fabric with raised ridges and smooth valleys, resulting in a cowl that is as visually stunning as it is functional. Whether you're a seasoned crocheter looking for a quick win or a confident beginner ready for a new challenge, this pattern is your ticket to a luxurious, handcrafted essential. Let's dive in and create something beautiful together.
Materials Needed
Before we begin, let's gather our tools and yarn. This project is wonderfully simple, requiring only a few key items. The magic lies in the chunky yarn and the large hook, which work together to create that plush, lofty fabric.
- Yarn: Super Bulky (Weight 6) yarn, approximately 120 yards. We recommend Lion Brand Wool-Ease Thick & Quick in the color 'Harbor' (or any similar super bulky yarn of your choice). The deep teal color adds a touch of sophistication, but feel free to choose a shade that speaks to your personal style.
- Crochet Hook: Size P/16 (11.5 mm) crochet hook. This larger hook is essential for achieving the correct gauge and creating that soft, drapey texture.
- Yarn Needle: A large-eye yarn needle for weaving in ends and seaming the cowl together.
- Scissors: For cutting your yarn.
- Measuring Tape (Optional): To check your gauge and finished measurements.
Understanding Your Gauge
Gauge is crucial for ensuring your cowl turns out the right size. The pattern calls for a gauge of 4 stitches and 4 rows in 2 inches of single crochet. Before you start, crochet a small swatch (about 4 inches by 4 inches) using single crochet. Measure the center of your swatch to see if you have 4 stitches and 4 rows per 2 inches. If you have more stitches, your tension is tight, and you should try a larger hook. If you have fewer stitches, your tension is loose, and you should try a smaller hook. Getting this right ensures your cowl will be the perfect size.
Step-by-Step Instructions
Now for the fun part! This pattern is worked in rows and then seamed together to form a tube. The stitch pattern is repetitive and meditative, making it perfect for relaxing with your favorite show or podcast. Let's break it down step-by-step.
Finished Size & Stitches Used
- Finished Size: Approximately 14 inches across (laid flat) and 10 inches high.
- Stitches Used: ch (chain), sc (single crochet), dc (double crochet), fpdc (front post double crochet), bpdc (back post double crochet).
The Alpine Ridge Stitch Pattern
This pattern is built on a simple 2-row repeat that creates the stunning ridge texture. It's worked over a foundation chain of multiples of 2 + 1. Here's the breakdown:
- Row 1: sc in 2nd ch from hook, skip 1 ch, 2 dc in next ch, skip 1 ch, sc in next ch repeat across, turn.
- Row 2: ch 1, sc in first sc, skip 2 dc, 2 dc in next sc (the sc from previous row), skip 2 dc, sc in next sc repeat across, turn.
- Row 3: ch 1, sc in first sc, skip 2 dc, 2 dc in next sc, skip 2 dc, sc in next sc repeat across, turn.
- Repeat Rows 2-3 for the pattern.
Let's Crochet Your Cowl
Follow these detailed instructions to create your very own Chunky Alpine Ridge Cowl. Take your time, and don't be afraid to count your stitches to stay on track.
- Foundation Chain: Chain 22 loosely. This will give you a cowl that is approximately 14 inches wide. If you want a wider or narrower cowl, simply chain any even number + 1 (e.g., 21, 23, 25, etc.). Remember, the more chains, the wider the cowl.
- Row 1 (Setting the Pattern): Work the Alpine Ridge Stitch pattern across the row as described above. Start by working a single crochet into the 2nd chain from your hook. Then, skip the next chain, work 2 double crochets into the following chain, skip the next chain, and work a single crochet into the next chain. Repeat this sequence across the entire row. At the end of the row, turn your work.
- Row 2 (Building the Ridges): Chain 1 (this counts as your first single crochet for the row). Work a single crochet into the first single crochet from the previous row. Now, you'll be working into the single crochet stitches from the row below. Skip the next 2 double crochets, work 2 double crochets into the next single crochet (the one that sits between the pairs of double crochets), skip the next 2 double crochets, and work a single crochet into the next single crochet. Repeat this sequence across the row. Turn your work.
- Row 3 and Beyond: Repeat Row 2. You will see the pattern begin to form as the double crochet clusters stack on top of each other, creating the raised ridges. Continue this pattern, repeating Rows 2 and 3, until you have completed a total of 20 rows. Keep your tension even throughout to ensure the ridges are uniform and the fabric lies flat.
- Finishing the Body: After you have completed Row 20, fasten off your yarn by cutting it, leaving a tail of about 12 inches. Pull the tail through the loop on your hook to secure it. Use your yarn needle to weave in this end and the starting tail from your foundation chain, hiding them within the stitches.
- Seaming Your Cowl: This is where we transform your rectangle into a cozy tube. Fold your work in half lengthwise, with the right sides (the side you want to show) facing each other. Using your yarn needle and a length of yarn (you can use the tail you left), whip stitch the short ends together. To whip stitch, simply insert your needle through the edge of one side, then the other, creating a spiral of yarn. Make sure to keep your stitches even and not too tight. Once you've sewn the entire seam, turn the cowl right side out. The seam will be hidden on the inside.
- Adding a Personal Touch (Optional): For a bit of flair, you can sew a decorative button or a leather tag onto the outside of your cowl. Make sure it's securely attached so it doesn't fall off during wear. This is a great way to make the cowl uniquely yours.
Caring for Your Handmade Cowl
To keep your beautiful cowl looking its best, it's important to care for it properly. Because it's made from super bulky yarn, it's best to hand wash it in cold water with a gentle detergent. Gently squeeze out the excess water (don't wring it!), and lay it flat on a clean towel to dry. Reshape it while it's damp to ensure it dries in the correct form. With proper care, your Chunky Alpine Ridge Cowl will be a beloved part of your wardrobe for years to come.
Congratulations! You've just created a stunning, textured cowl that's perfect for adding a touch of handmade luxury to any outfit. This project is a fantastic way to practice your post stitches and create a piece you'll be proud to wear. Enjoy the warmth and compliments that are sure to come your way!


