Aurora Waves Throw Pillow Free Pattern – Textured Knitted Cushion Cover
Aurora Waves Throw Pillow Free Pattern – Textured Knitted Cushion Cover
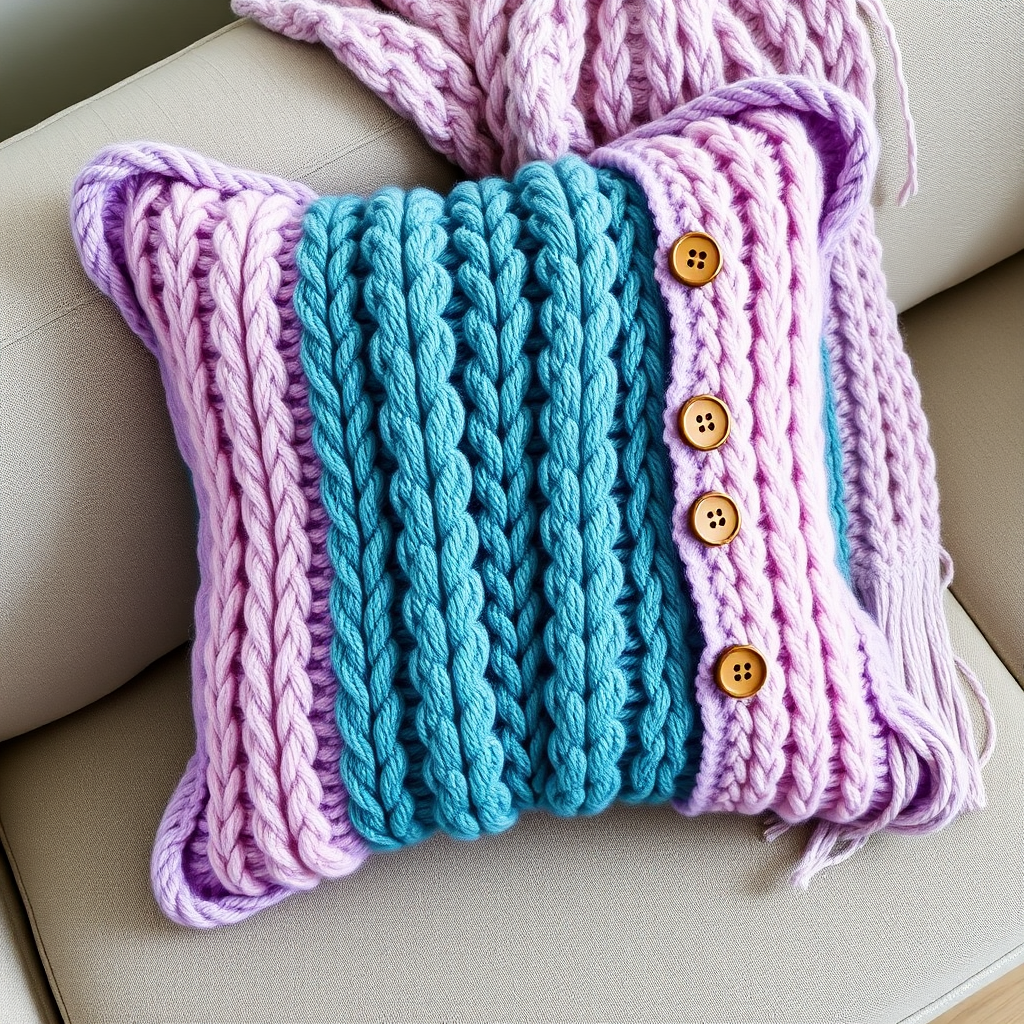
Bring the serene, ethereal beauty of the northern lights into your living space with this richly textured knitted pillow cover. The interlocking cables and soft gradient yarn create a cozy, modern accent piece that invites you to curl up and relax. Whether you're an experienced knitter looking for a satisfying project or a confident beginner ready to tackle your first cable pattern, this design delivers stunning, professional-looking results. The gradient color transition—from deep teal through soft lavender to pale pink—mimics the aurora borealis, making this cushion a true statement piece for any sofa, armchair, or bed.
This pattern is worked flat in one main piece with two back panels, making it easy to manage and perfect for practicing cable techniques. The envelope closure with button details adds a polished finish while allowing you to easily remove and wash the cover. Let's dive into this rewarding project that will transform your home decor with handcrafted charm.
Materials Needed
Before you begin, gather the following supplies to ensure a smooth knitting experience:
- Yarn: Worsted weight yarn in a gradient of deep teal, soft lavender, and pale pink (approximately 300g total). You can use a self-striping gradient yarn or hold three separate colors and change as you knit. For best results, choose a soft, plush yarn like merino wool or a wool-acrylic blend for durability and comfort.
- Knitting Needles: US 8 (5mm) knitting needles. Straight needles are fine for this project, or use circular needles if you prefer to hold more stitches comfortably.
- Cable Needle: A small cable needle (or double-pointed needle) for the cable twists.
- Stitch Markers: Optional but helpful for keeping track of pattern repeats.
- Tapestry Needle: For seaming and weaving in ends.
- Buttons: Two wooden buttons (approximately 1 inch in diameter) for the envelope closure.
- Pillow Form: One 16x16 inch pillow insert.
- Scissors and Measuring Tape: For trimming yarn and checking gauge.
Gauge: 18 stitches and 24 rows = 4 inches in stockinette stitch. Always knit a swatch first to ensure your tension matches, as this will affect the final size of your pillow cover.
Step-by-Step Instructions
This pillow cover is knitted flat in one piece and seamed, with a simple envelope closure on the back. Follow these detailed instructions carefully, and you'll have a beautiful, professional-looking cushion cover in no time.
Front Panel (Cable Pattern)
The front panel features a bold, textured cable pattern that resembles interlocking waves. The gradient yarn will naturally transition through its colors as you knit, creating the aurora effect.
- Cast On: Cast on 80 stitches using your preferred method (long-tail cast on works well).
- Rows 1-6 (Garter Stitch Edge): Knit every row for 6 rows. This creates a sturdy, non-curling edge that frames the cable pattern beautifully.
- Row 7 (Right Side - Pattern Setup): K4, *P6, K8, P6, K4*; repeat from * to * across the row. You will have 5 complete repeats of the pattern. This establishes the cable and purl background.
- Row 8 (Wrong Side): P4, *K6, P8, K6, P4*; repeat from * to * across. Remember, on wrong-side rows, you knit the purls and purl the knits from the previous row.
- Rows 9-12: Repeat Rows 7 and 8 twice more. This gives you a solid base before the first cable twist.
- Row 13 (Cable Row - Right Side): K4, *P6, slip next 4 stitches to cable needle and hold in front, K4, then K4 from cable needle, P6, K4*; repeat from * to * across. This creates a left-leaning cable twist. Ensure you keep your tension even when working the cable stitches.
- Rows 14-20: Work in pattern as established (knit the knits, purl the purls) for 7 rows. This means on right-side rows: K4, *P6, K8, P6, K4*; on wrong-side rows: P4, *K6, P8, K6, P4*.
- Row 21: Repeat Row 13 (another cable twist).
- Continue Pattern: Repeat Rows 14-21 until the front panel measures 18 inches from the cast-on edge, ending with a wrong-side row. This will give you approximately 8-9 cable twists, depending on your gauge.
- Finishing Edge: Work 6 rows of garter stitch (knit every row) to match the bottom edge.
- Bind Off: Bind off loosely to prevent the edge from pulling. Weave in the yarn ends.
Back Panels (Envelope Closure)
The back of the pillow uses a smooth stockinette stitch with an envelope closure, allowing you to easily insert and remove the pillow form. You'll create two panels: a top panel with buttonholes and a bottom panel that overlaps underneath.
Top Back Panel (with Buttonholes)
- Cast On: Cast on 80 stitches.
- Stockinette Stitch: Work in stockinette stitch (knit right side, purl wrong side) for 8 inches from the cast-on edge. End with a wrong-side row.
- Buttonhole Row (Right Side): K1, *K2tog, YO*; repeat from * to * across, end K1. This creates a row of eyelet buttonholes. The yarn overs will create holes for your buttons.
- Continue: Continue in stockinette stitch for 2 more inches after the buttonhole row. This creates a nice flap that will fold over.
- Bind Off: Bind off loosely. Weave in ends.
Bottom Back Panel
- Cast On: Cast on 80 stitches.
- Stockinette Stitch: Work in stockinette stitch for 10 inches from the cast-on edge.
- Bind Off: Bind off loosely. Weave in ends.
Finishing and Assembly
Proper blocking and careful seaming will give your pillow cover a professional, polished look. Follow these steps to assemble your cushion cover:
- Block All Pieces: Wet block or steam block all three pieces to the correct measurements. The front panel should measure 16x16 inches (or slightly larger to accommodate the pillow form). The back panels should also measure 16 inches wide, with the top panel being approximately 10 inches long and the bottom panel 10 inches long. Blocking helps even out the stitches and makes the cables pop.
- Position the Panels: Lay the front panel flat with the right side facing up. Place the bottom back panel on top, right side down, aligning the bottom and side edges. The bottom panel should cover the lower portion of the front panel.
- Sew the Bottom Panel: With right sides together, sew the bottom back panel to the front panel along the bottom edge and both side edges. Use a mattress stitch or whip stitch for a neat seam. Leave the top edge open.
- Attach the Top Panel: Now, place the top back panel on the front panel, right side down, aligning the top and side edges. The buttonhole edge should be at the top. Sew along the top edge and both side edges, leaving the buttonhole edge open. This creates an envelope flap.
- Turn Right Side Out: Carefully turn the entire cover right side out through the opening. Gently push out the corners for a crisp finish.
- Sew on Buttons: Position the two wooden buttons on the bottom back panel so they align with the buttonholes on the top flap. Sew them securely in place. The buttons should sit approximately 1-2 inches from the top edge of the bottom panel.
- Insert Pillow Form: Insert the 16x16 inch pillow form through the opening. Fold the top flap over the bottom panel and button it closed.
- Final Adjustments: Smooth out the fabric and adjust the pillow form inside. Your Aurora Waves Throw Pillow is now ready to display!
Tips for Success
- Gauge Matters: Always check your gauge before starting. If your gauge is off, the pillow cover may not fit your pillow form properly.
- Use Stitch Markers: Place a marker between each pattern repeat to help you keep track of where you are, especially on cable rows.
- Keep Tension Even: When working cables, be careful not to pull the yarn too tightly. This can distort the fabric and make the cables look bunched.
- Blocking is Key: Don't skip blocking! It makes a huge difference in the final appearance of cable patterns, opening up the stitches and making the texture crisp and defined.
- Color Transition: If using separate yarn colors, plan your color changes. You might want to change colors at the beginning of a row for a clean transition, or use a gradient yarn for a seamless effect.
This pattern is a wonderful way to add a handmade touch to your home decor. The combination of classic cable knitting with a modern gradient palette makes this pillow a timeless piece that will be admired for years to come. Enjoy the process, and don't hesitate to make it your own by experimenting with different color combinations or yarn textures. Happy knitting!


