Aurora Dune Scarf Free Pattern – Knitted Gradient Chevron Wrap
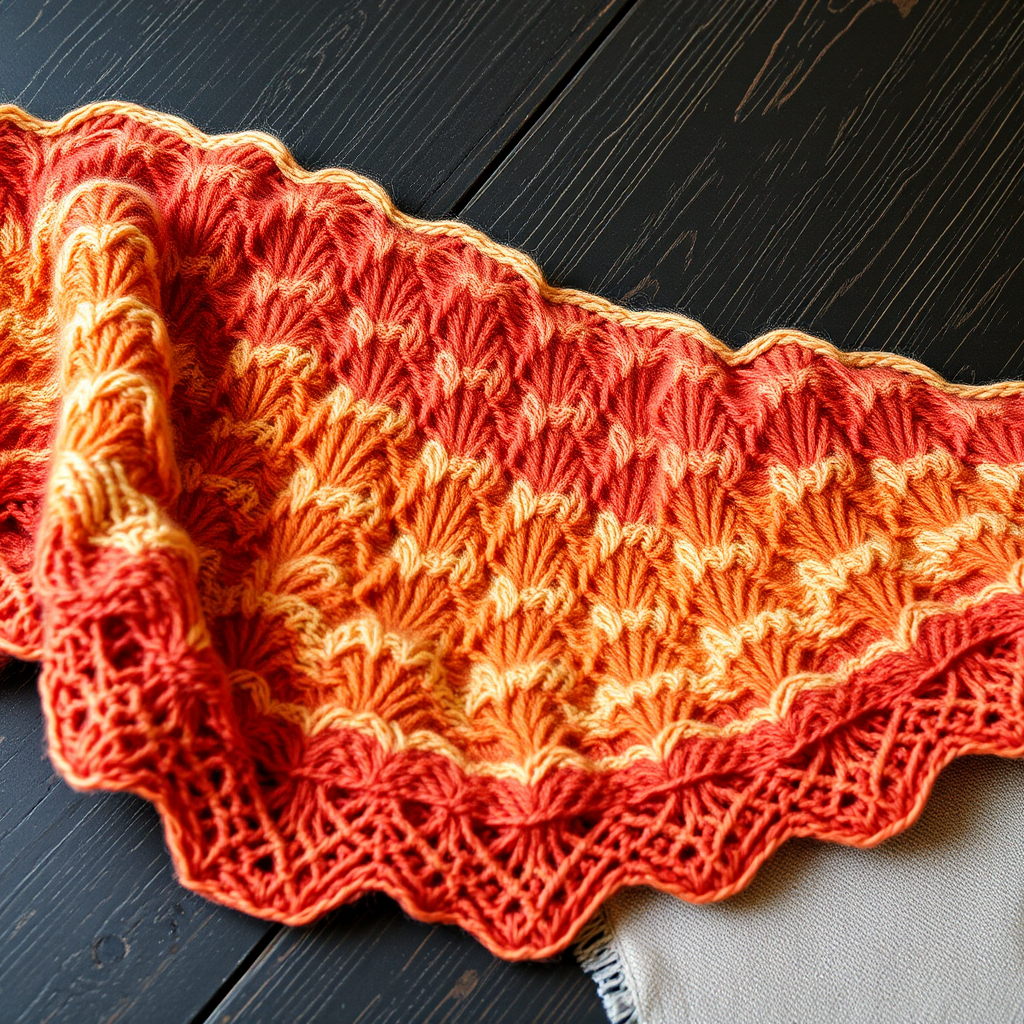
Aurora Dune Scarf Free Pattern – Knitted Gradient Chevron Wrap
Wrap yourself in the shifting colors of a desert sunset with this knitted gradient chevron scarf. The rhythmic increases and decreases create a mesmerizing ripple texture that feels as luxurious as it looks. This beginner-friendly pattern uses simple knit and purl stitches, paired with easy yarn overs and decreases, to produce a stunning, professional-looking result. Whether you're a seasoned knitter or just starting your journey, this scarf is a rewarding project that will become a staple in your handmade wardrobe.
Materials Needed
Before you begin, gather the following materials. The quality of your yarn will greatly affect the final drape and feel of your scarf, so choose a soft, high-quality DK weight yarn for the best results.
- Yarn: DK weight yarn in 3 coordinating colors (Color A: 220 yds, Color B: 220 yds, Color C: 220 yds) – suggested: soft merino or alpaca blend
- Needles: US 6 (4.0 mm) knitting needles
- Gauge: 22 stitches and 28 rows = 4 inches in stockinette stitch (blocked)
- Extras: Tapestry needle for weaving in ends, scissors, blocking mats and pins (optional but recommended)
Pattern Overview
This scarf is worked flat in one piece, using a simple chevron lace pattern. The color changes are made every 14 rows to create a smooth, gradual gradient effect. The finished measurements are approximately 12 inches wide x 70 inches long (blocked), making it a versatile wrap that can be worn in multiple ways.
Abbreviations
- CO: cast on
- K: knit
- P: purl
- K2tog: knit two together (decrease)
- SSK: slip, slip, knit (decrease)
- YO: yarn over
- RS: right side
- WS: wrong side
Pattern Notes
- The scarf is worked flat in one piece, using a simple chevron lace pattern.
- Color changes are made every 14 rows to create a smooth gradient effect.
- All slipped stitches are slipped purlwise unless otherwise stated.
Step-by-Step Instructions
Follow these detailed instructions carefully, and you'll have a beautiful, handcrafted scarf in no time. Take your time with each row, and don't be afraid to count your stitches periodically to ensure accuracy.
Step 1: Cast On
With Color A, CO 55 stitches loosely. A loose cast-on is essential to prevent the edges from pulling and to ensure the chevron pattern drapes beautifully. You can use the long-tail cast-on method for a neat, stretchy edge.
Step 2: Set-Up Row (WS)
Purl all stitches. This row establishes the wrong side of your work and creates a clean base for the chevron pattern to begin.
Step 3: Chevron Pattern (Worked over 55 stitches)
Now you'll begin the main pattern. Work the following 14 rows, repeating them as directed in the color change section. The pattern is a rhythmic sequence of yarn overs and decreases that create the signature chevron ripple.
Row 1 (RS): K2, *YO, K3, SSK, K2tog, K3, YO, K1; repeat from * to last 3 stitches, K3.
Row 2 (WS): Purl all stitches.
Row 3 (RS): K2, *K1, YO, K2, SSK, K2tog, K2, YO, K2; repeat from * to last 3 stitches, K3.
Row 4 (WS): Purl all stitches.
Row 5 (RS): K2, *K2, YO, K1, SSK, K2tog, K1, YO, K3; repeat from * to last 3 stitches, K3.
Row 6 (WS): Purl all stitches.
Row 7 (RS): K2, *K3, YO, SSK, K2tog, YO, K4; repeat from * to last 3 stitches, K3.
Row 8 (WS): Purl all stitches.
Row 9 (RS): K2, *K3, YO, SSK, K2tog, YO, K4; repeat from * to last 3 stitches, K3.
Row 10 (WS): Purl all stitches.
Row 11 (RS): K2, *K2, YO, K1, SSK, K2tog, K1, YO, K3; repeat from * to last 3 stitches, K3.
Row 12 (WS): Purl all stitches.
Row 13 (RS): K2, *K1, YO, K2, SSK, K2tog, K2, YO, K2; repeat from * to last 3 stitches, K3.
Row 14 (WS): Purl all stitches.
Step 4: Color Changes
To achieve the beautiful gradient effect, you'll change colors every 14 rows (one full repeat of the pattern). Follow this sequence carefully:
- Work Rows 1-14 with Color A.
- Change to Color B and work Rows 1-14 again.
- Change to Color C and work Rows 1-14 again.
- Continue alternating colors in this order (A, B, C, B, A, B, C, B, A) until the scarf measures approximately 70 inches, ending with a WS row. You will have 9 color blocks total.
Tip: When changing colors, do so at the beginning of a RS row for the cleanest transition. Leave a tail of about 6 inches to weave in later.
Step 5: Finishing
Once your scarf reaches the desired length, it's time to bind off and finish. This special bind-off method creates a stretchy, decorative edge that complements the chevron pattern.
- Bind off loosely on the next RS row using the K2tog bind off method: K2, *insert left needle into the two stitches on right needle, knit them together through back loop, K1; repeat from * until one stitch remains. Cut yarn and pull through.
- Weave in all ends using a tapestry needle. Be sure to weave in ends securely, following the path of the yarn to keep them invisible.
- Block gently to open up the chevron pattern and even out the edges. Wet blocking is recommended for this project. Soak the scarf in lukewarm water with a gentle wool wash, then gently squeeze out excess water (do not wring). Lay flat on a towel, shape to the correct dimensions, and pin the edges to create crisp, even points. Allow to dry completely.
Final Thoughts
Your Aurora Dune Scarf is now complete! The rhythmic chevron pattern and the warm, gradient colors make this a truly special piece. Whether you keep it for yourself or gift it to a loved one, this scarf is sure to be treasured. The combination of simple stitches and thoughtful color changes creates a sophisticated result that looks far more complex than it is. Enjoy wearing your beautiful, handmade creation, and take pride in the skill and care you've woven into every stitch.


