Aurora Borealis Star Stitch Fingerless Gloves Free Knitting Pattern
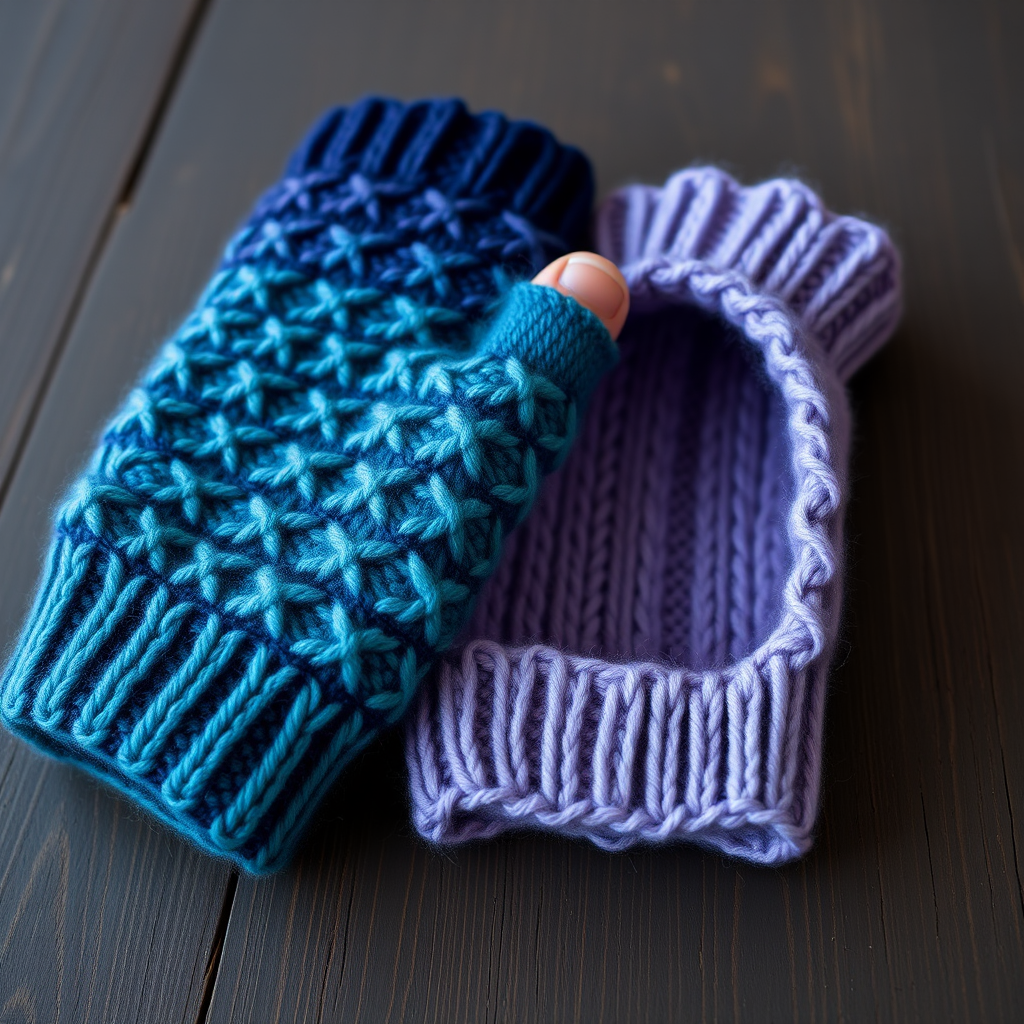
Wrap Your Hands in the Northern Lights: The Aurora Borealis Star Stitch Fingerless Gloves
There is something truly magical about a knitting pattern that feels both celestial and cozy. The Aurora Borealis Star Stitch Fingerless Gloves capture the shimmering, layered glow of the northern lights in a uniquely textured accessory. Using a gorgeous slipped-stitch technique, these gloves create a dimensional, star-studded surface that catches the light beautifully. Whether you are a seasoned knitter looking for a new texture or a confident beginner ready for a challenge, this free pattern will guide you through creating a stunning, jewel-toned pair of hand warmers that are perfect for crisp winter days.
This pattern is worked flat and seamed, which makes it incredibly portable and easy to manage. The star stitch is a simple repeat that looks far more complex than it is, making it a rewarding project that works up quickly in worsted weight yarn. Let’s dive into the celestial details and get your needles clicking.
Materials Needed
Before you begin your aurora adventure, gather the following materials. The color gradient is key to achieving that northern lights effect, so choose shades that speak to you.
- Yarn: Worsted weight yarn in three colors:
- Color A (Cuff): Deep Teal (approx. 60 yards)
- Color B (Main Body): Midnight Blue (approx. 100 yards)
- Color C (Top & Thumb): Soft Lavender (approx. 40 yards)
- Needles: US Size 7 (4.5 mm) knitting needles, or size needed to obtain gauge.
- Notions: Tapestry needle for weaving in ends, stitch holder or waste yarn for the thumb, stitch markers.
Gauge: 20 stitches and 28 rows = 4 inches in stockinette stitch. Gauge is not critical for this project, but it will affect the final fit. A tighter gauge will yield a snugger glove.
Step-by-Step Instructions
This pattern is worked flat and seamed. The magic of the star stitch comes from slipping stitches with the yarn in front, creating a raised, dimensional "star" point. Let's break it down.
Special Stitches
Understanding these two simple rows is all you need to master the texture.
- Star Stitch (worked over 4 stitches): Slip 1 stitch purlwise with yarn in front, purl 3. This creates a 'star' point.
- Star Stitch Row (RS): *Slip 1 purlwise with yarn in front, purl 3; repeat from * to end.
- Star Stitch Row (WS): Purl all stitches.
Cuff
We begin with a stretchy, classic ribbed cuff in our deep teal color.
- With Color A, cast on 36 stitches.
- Work in K1, P1 ribbing for 2 inches. This creates a snug, comfortable wrist fit.
Main Body
Now we switch to the midnight blue and begin the star stitch dance. The pattern alternates between stockinette and the star stitch rows to create the dimensional fabric.
- Switch to Color B.
- Row 1 (RS): Knit all stitches.
- Row 2 (WS): Purl all stitches.
- Row 3 (RS): Work Star Stitch Row across.
- Row 4 (WS): Purl all stitches.
- Row 5 (RS): Knit all stitches.
- Row 6 (WS): Purl all stitches.
- Row 7 (RS): Work Star Stitch Row across.
- Row 8 (WS): Purl all stitches.
Repeat Rows 1-8 once more, but on this second repeat, we will offset the star stitch pattern by 2 stitches to create a beautiful, staggered, organic effect, just like the shifting aurora.
- Row 7 (RS) of second repeat: Purl 2, then work Star Stitch Row across the remaining 34 stitches.
Thumb Gusset
Now we will shape the thumb by increasing stitches on either side of a marker. Continue in the established pattern (alternating stockinette and star stitch rows) as you work these increases.
- Row 1 (RS): Knit 18, place marker, M1 (make one), knit 1, M1, knit to end. (38 stitches)
- Row 2 (WS): Purl all stitches.
- Row 3 (RS): Work Star Stitch Row across, but when you reach the marker, work the increases as follows: Slip marker, M1, knit 1, M1, slip marker, continue in pattern.
- Row 4 (WS): Purl all stitches.
Repeat Rows 1-4, working the increases on either side of the marker, until you have 13 stitches between the markers. Your total stitch count will now be 48 stitches (36 + 12 increases).
Separate Thumb
It's time to isolate the thumb stitches and continue knitting the hand of the glove.
- Next Row (RS): Work in pattern across the first 18 stitches, place the next 13 stitches on a stitch holder or waste yarn for the thumb, cast on 1 stitch, then work in pattern across the remaining 17 stitches. (37 stitches total for the hand).
- Continue in the established pattern (alternating stockinette and star stitch rows) until the glove measures 2 inches from the thumb separation, ending with a WS row.
Top Ribbing
We finish the hand with a soft lavender, stretchy ribbed edge.
- Switch to Color C.
- Work in K1, P1 ribbing for 1 inch.
- Bind off loosely in ribbing.
Thumb
Now we bring the thumb to life.
- Place the 13 thumb stitches back onto your needles.
- With Color C, pick up and knit 1 stitch from the cast-on edge at the base of the thumb. (14 stitches).
- Work in K1, P1 ribbing for 1 inch.
- Bind off loosely in ribbing.
Finishing
The final steps are where your gloves come together.
- Weave in all ends with your tapestry needle.
- Sew the side seam of the glove, leaving a small opening for the thumb if needed.
- Repeat for the second glove, but mirror the thumb gusset placement. To do this, increase at the beginning of the row instead of the middle. This ensures you have a left and a right glove that fit your hands perfectly.
And there you have it—a stunning pair of Aurora Borealis fingerless gloves that are as functional as they are beautiful. The rich gradient of teal, midnight blue, and lavender, combined with the dimensional star stitch, makes these a standout addition to any winter wardrobe. They also make a thoughtful, handmade gift for the celestial soul in your life. Happy knitting!



