Aurora Borealis Cocoon Cardigan Free Pattern
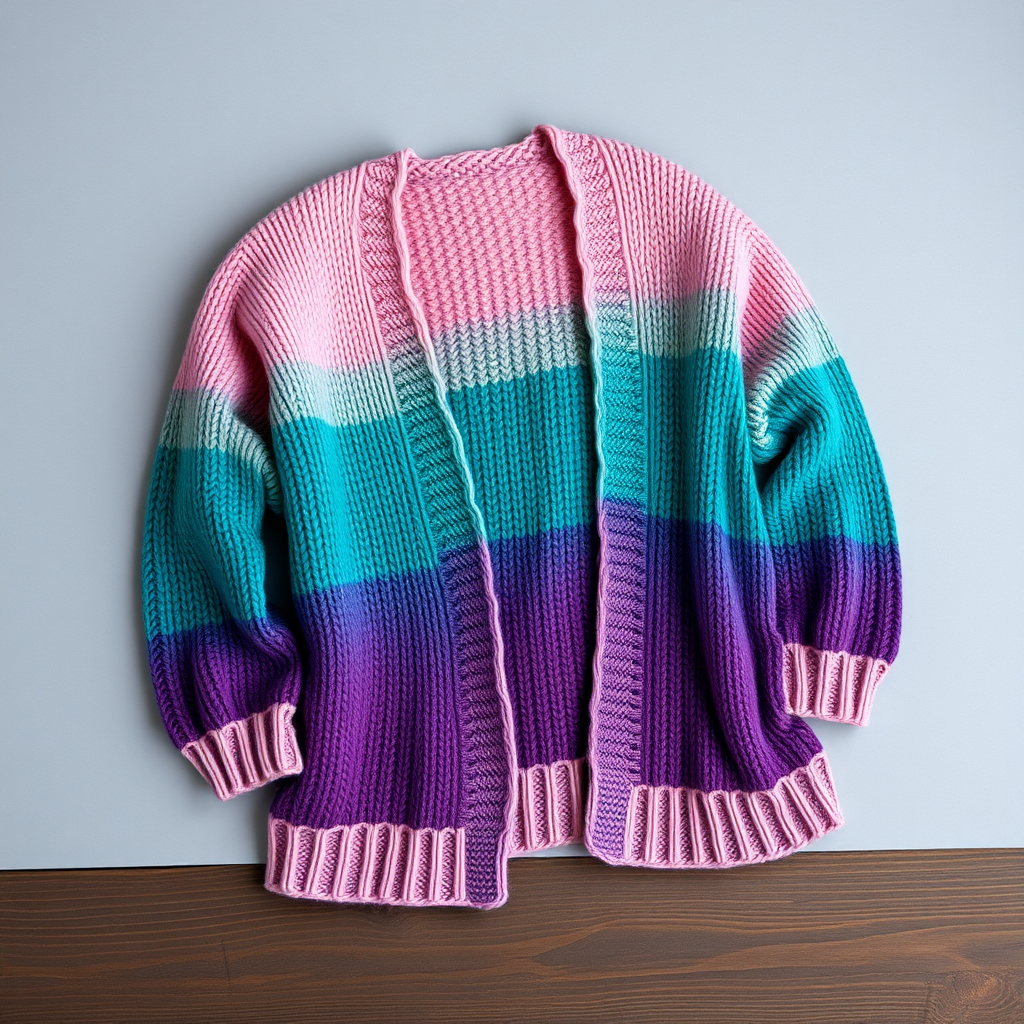
Aurora Borealis Cocoon Cardigan Free Knitting Pattern
Wrap yourself in the swirling, color-shifting magic of the northern lights with this cozy, oversized cocoon cardigan. This free knitting pattern uses a simple two-row repeat to create a stunning, gradient fabric that is both modern and timeless. The boxy, draped silhouette and deep V-neckline make it a versatile layering piece, while the thick worsted weight yarn ensures it's as warm and snuggly as it is beautiful. Whether you're a seasoned knitter or a confident beginner looking for a rewarding project, this cardigan is a joy to create and even more delightful to wear.
Materials Needed
Before you begin, gather the following materials to ensure a smooth knitting experience:
- Yarn: Worsted weight yarn in 4 colors:
- Color A (Deep Teal)
- Color B (Emerald)
- Color C (Violet)
- Color D (Dusty Pink)
- Needle: US Size 9 (5.5 mm) 32-inch circular knitting needle (for working flat).
- Other: Stitch markers, tapestry needle for weaving in ends, and scissors.
Gauge
16 stitches and 24 rows = 4 inches in stockinette stitch (knit on RS, purl on WS). Always take time to check your gauge to ensure the correct finished measurements.
Step-by-Step Instructions
Sizes & Measurements
This pattern is written for three sizes: S/M (M/L, L/XL). Finished chest circumference: 50 (56, 62) inches. The cardigan is designed to be oversized and cocoon-like, so the generous fit is intentional.
Important Notes Before You Start
- The cardigan is worked flat in one piece from the bottom up, then seamed at the shoulders.
- The color changes create a gradient effect. Carry the unused yarn up the side of the work to avoid cutting and re-joining constantly.
- Color Sequence: Work 10 rows with Color A, 10 rows with Color B, 10 rows with Color C, 10 rows with Color D, then repeat this sequence throughout the body and sleeves.
Bottom Ribbing
With Color A, cast on 200 (224, 248) stitches.
Row 1 (RS): *K2, P2; repeat from * to end.
Row 2 (WS): *P2, K2; repeat from * to end.
Repeat Rows 1-2 for 2 inches, ending with a WS row. This creates a sturdy, stretchy ribbed hem.
Body
Switch to stockinette stitch (Knit on RS, Purl on WS).
Continue in stockinette, following the color sequence (10 rows of each color, repeating), until the piece measures 18 (20, 22) inches from the cast-on edge, ending with a WS row. This forms the main body of the cardigan.
Shape Shoulders & Neck Opening
Next Row (RS): Knit 75 (84, 93) stitches, bind off the next 50 (56, 62) stitches for the neck, knit to end. You will now have two separate sections for the right and left fronts.
Right Front
Work on the last 75 (84, 93) stitches (the ones you just knit).
Row 1 (WS): Purl.
Row 2 (RS): Knit to last 2 stitches, k2tog (decrease 1 stitch at neck edge).
Repeat Rows 1-2 until 60 (68, 76) stitches remain. This shapes the V-neckline.
Work even in stockinette (no decreases) until the piece measures 24 (26, 28) inches from the cast-on edge. Bind off all stitches.
Left Front
Rejoin yarn to the remaining 75 (84, 93) stitches with the WS facing.
Row 1 (WS): Purl.
Row 2 (RS): K2tog, knit to end (decrease 1 stitch at neck edge).
Repeat Rows 1-2 until 60 (68, 76) stitches remain.
Work even in stockinette until the piece measures 24 (26, 28) inches from the cast-on edge. Bind off all stitches.
Sleeves (Make 2)
With Color A, cast on 40 (44, 48) stitches.
Work K2, P2 ribbing for 2 inches.
Switch to stockinette stitch. Increase 1 stitch at each end of the next RS row, then every 6th row until you have 60 (66, 72) stitches. This creates a gently tapered sleeve.
Continue in stockinette, following the same color sequence as the body, until the sleeve measures 18 (19, 20) inches from the cast-on edge. Bind off all stitches.
Finishing & Assembly
- Sew Shoulder Seams: Use a tapestry needle and matching yarn to sew the shoulder seams of the right and left fronts together.
- Sew Sleeve Seams: Fold each sleeve in half lengthwise (right sides together) and sew the underarm seam.
- Set in Sleeves: With right sides together, pin the sleeve caps into the armholes of the body. Sew the sleeves in place, easing any extra fabric evenly.
- Weave in Ends: Carefully weave in all loose yarn ends using a tapestry needle.
- Block to Measurements: Lay the cardigan flat on a blocking mat. Gently shape it to the specified measurements (chest, length, sleeve length) and pin in place. Mist with water and allow to dry completely. This step is crucial for a professional finish and to even out the stitches.
Your Aurora Borealis Cocoon Cardigan is now complete! Enjoy the cozy, color-shifting beauty of your handmade creation.



